|
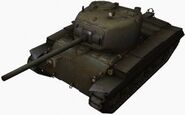
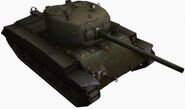
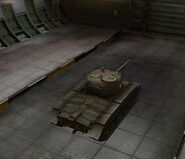
The T20 is a Tier VII American Medium Tank.
Fast, swift, and having a small profile it plays like a standard American medium - an excellent scout but not a good damage dealer due to a poor gun but can snipe with decent accuracy. It’s upper glacis plate has thin armor, meaning anyone can penetrate it.
Module
 |
Tier | Engine | Engine Power | Chance of fire on impact |
Weight | Price |
|---|---|---|---|---|---|---|
 |
Tier | Gun | Penetraion (mm) | Damage (hp) | Rate of Fire (rounds/ minuter) | Aim Time | Weight | Price |
|---|---|---|---|---|---|---|---|---|
 |
Tier | Radio | Signal Range(m) | Weight | Price |
|---|---|---|---|---|---|
 |
Tier | Suspension | Load Limit (T) |
Traverse Speed |
Turn Radius | Weight | Price |
|---|---|---|---|---|---|---|---|
 |
Tier | Turret | Turret Armor (front/Side/Rear) |
Turret Traverse Speed |
View Range (m) |
Weight | Price |
|---|---|---|---|---|---|---|---|
Stock ConfigurationThis configuration applies to the lowest possible modules that can be mounted onto this tank without equipment, perks, camo, or skills applied with a 100% trained crew. Also note that the shell penetration is done a 100m or less, corresponding to the shell type being used. Mobility
Horsepower: {{{Horsepower}}} Power/weight ratio: {{{pw/w}}} hp/t Traverse: {{{Traverse}}} deg/s Weight: {{{Weight}}} metric tons Pivot: {{{Pivot}}} Armament
Shells: {{{ShellTypes}}} Shell Velocity: {{{ShellVelocity}}} m/s Penetration: {{{Penetration}}} mm Alpha Damage: {{{Alpha}}} Rate Of Fire: {{{RoF}}} r/m Damage Per Minute: {{{DPM}}} Accuracy: {{{Dispersion}}}m Aiming Time: {{{AimingTime}}}s Gun Arc: {{{GunTraverseRange}}} degrees Gun Elevations: {{{GunElevations}}} degrees Ammo Capacity: {{{AmmoCount}}} shells Other
Chance Of Fire: {{{ChanceOfFire}}}% View range: {{{ViewRange}}}m Signal Range: {{{Radio}}}m Armor
Hit Points: {{{HitPoints}}} Hull Armor: {{{HullArmor}}} mm Turret Armor: {{{TurretArmor}}} mm Weak Spots: {{{ListWeakSpots}}} |
Top ConfigurationThis configuration applies to the highest possible modules that can be mounted onto this tank without equipment, perks, camo, or skills applied with a 100% trained crew. Also note that the shell penetration is done a 100m or less, corresponding to the shell type being used. Mobility
Horsepower: {{{Horsepower}}} Power/weight ratio: {{{pw/w}}} hp/t Traverse: {{{Traverse}}} deg/s Weight: {{{Weight}}} metric tons Pivot: {{{Pivot}}} Armament
Shells: {{{ShellTypes}}} Shell Velocity: {{{ShellVelocity}}} m/s Penetration: {{{Penetration}}} mm Alpha Damage: {{{Alpha}}} Rate Of Fire: {{{RoF}}} r/m Damage Per Minute: {{{DPM}}} Accuracy: {{{Dispersion}}}m Aiming Time: {{{AimingTime}}}s Gun Arc: {{{GunTraverseRange}}} degrees Gun Elevations: {{{GunElevations}}} degrees Ammo Capacity: {{{AmmoCount}}} shells OtherChance Of Fire: {{{ChanceOfFire}}}% View range: {{{ViewRange}}}m Signal Range: {{{Radio}}}m Camouflage Rating: Stationary: {{{CamoStationary}}}% Moving: {{{CamoMoving}}}% Armor
Hit Points: {{{HitPoints}}} Hull Armor: {{{HullArmor}}} mm Turret Armor: {{{TurretArmor}}} mm Weak Spots: {{{ListWeakspots}}} |
| In-Game Gallery |
|---|
| Historical Gallery |
|---|
Stock ConfigurationThis configuration applies to the lowest possible modules that can be mounted onto this tank without equipment, perks, camo, or skills applied with a 100% trained crew. Also note that the shell penetration is done a 100m or less, corresponding to the shell type being used. Mobility
Horsepower: {{{Horsepower}}} Power/weight ratio: {{{pw/w}}} hp/t Traverse: {{{Traverse}}} deg/s Weight: {{{Weight}}} metric tons Pivot: {{{Pivot}}} Armament
Shells: {{{ShellTypes}}} Shell Velocity: {{{ShellVelocity}}} m/s Penetration: {{{Penetration}}} mm Alpha Damage: {{{Alpha}}} Rate Of Fire: {{{RoF}}} r/m Damage Per Minute: {{{DPM}}} Accuracy: {{{Dispersion}}}m Aiming Time: {{{AimingTime}}}s Gun Arc: {{{GunTraverseRange}}} degrees Gun Elevations: {{{GunElevations}}} degrees Ammo Capacity: {{{AmmoCount}}} shells Other
Chance Of Fire: {{{ChanceOfFire}}}% View range: {{{ViewRange}}}m Signal Range: {{{Radio}}}m Armor
Hit Points: {{{HitPoints}}} Hull Armor: {{{HullArmor}}} mm Turret Armor: {{{TurretArmor}}} mm Weak Spots: {{{ListWeakSpots}}} |
Top ConfigurationThis configuration applies to the highest possible modules that can be mounted onto this tank without equipment, perks, camo, or skills applied with a 100% trained crew. Also note that the shell penetration is done a 100m or less, corresponding to the shell type being used. Mobility
Horsepower: {{{Horsepower}}} Power/weight ratio: {{{pw/w}}} hp/t Traverse: {{{Traverse}}} deg/s Weight: {{{Weight}}} metric tons Pivot: {{{Pivot}}} Armament
Shells: {{{ShellTypes}}} Shell Velocity: {{{ShellVelocity}}} m/s Penetration: {{{Penetration}}} mm Alpha Damage: {{{Alpha}}} Rate Of Fire: {{{RoF}}} r/m Damage Per Minute: {{{DPM}}} Accuracy: {{{Dispersion}}}m Aiming Time: {{{AimingTime}}}s Gun Arc: {{{GunTraverseRange}}} degrees Gun Elevations: {{{GunElevations}}} degrees Ammo Capacity: {{{AmmoCount}}} shells OtherChance Of Fire: {{{ChanceOfFire}}}% View range: {{{ViewRange}}}m Signal Range: {{{Radio}}}m Camouflage Rating: Stationary: {{{CamoStationary}}}% Moving: {{{CamoMoving}}}% Armor
Hit Points: {{{HitPoints}}} Hull Armor: {{{HullArmor}}} mm Turret Armor: {{{TurretArmor}}} mm Weak Spots: {{{ListWeakspots}}} |
The following is spoilers and historical inaccuracy about this vehicle! The reason Wargaming did this is due to game balancing in most cases! To see, click open {{{Spoiler}}} |
Researching OrderFollow these steps in order. These steps are arranged to minimize the pain of stock grinding. Click Open to read. {{{Research}}} |


